Designing with custom CSS offers full control over the website's style but can be more laborious than using a CSS framework. Custom CSS requires more time to write, can lead to consistency issues, and demands manual responsiveness adjustments. It also involves a steeper learning curve, more effort in ensuring browser compatibility, and lacks the extensive documentation and community support that frameworks offer. However, it avoids loading unnecessary styles, which can optimize performance. The choice between custom CSS and a framework depends on the project's requirements.
In the same sense, designing templates in Drupal involves creating a theme with files for appearance, using the Twig engine for templates, and adding CSS/JS assets. Themes include regions for content placement and should be responsive. Sub-theming allows customization of existing themes. The process enables the creation of tailored and functional website designs.
But then again, the idea of creating the design by manually describing each class by properties and what not is indeed laborious. Hence, using a CSS framework in conjunction with Twig for web design can significantly streamline the development process.
The combination of Twig and a CSS framework allows for a powerful separation of concerns. Developers can focus on the server-side logic and data manipulation, while designers can concentrate on the presentation layer, applying CSS classes to style the content dynamically generated by Twig.
Drupal, known for its robustness and flexibility as a content management system, provides a solid foundation for building dynamic websites. When combined with Tailwind CSS, a utility-first CSS framework, it allows developers to create custom designs with speed and efficiency. This article will guide you through the process of integrating Tailwind CSS into your Drupal site to achieve a modern, responsive design.
Why Tailwind CSS?
Tailwind CSS stands out for its approach to styling. It offers a suite of utility classes that can be composed to build any design directly in your markup. It's highly customizable, which means you can define your design system without leaving your HTML.
To know more about Tailwind CSS, please visit the official documentation at: https://tailwindcss.com/
Prerequisites
Before we dive deeper into Tailwind CSS integration, ensure to have prepared the following
- Local Drupal Setup (a fresh new site is recommended)
- Node to run npm and npx commands
Setup 1. Setup a starter kit theme for Drupal:
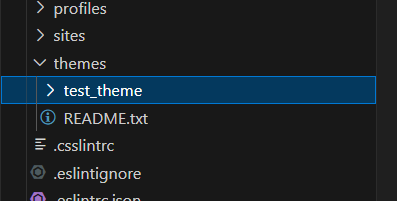
For this activity, we are going to implement the design on a fresh Drupal theme. A new theme named test_theme (you may name the theme the way you want it) can be generated by running the following command from the Drupal root:
php web/core/scripts/drupal generate-theme test_theme
This will create the theme to the /themes directory by default.
Or, you may also want to check this article here to create your own Drupal theme!
STEP 2. Enable the Theme and set it as the site's default theme.
On the Drupal site, navigate to Admin > Appearance. You can see a list of installed and available themes, including the newly created test_theme.
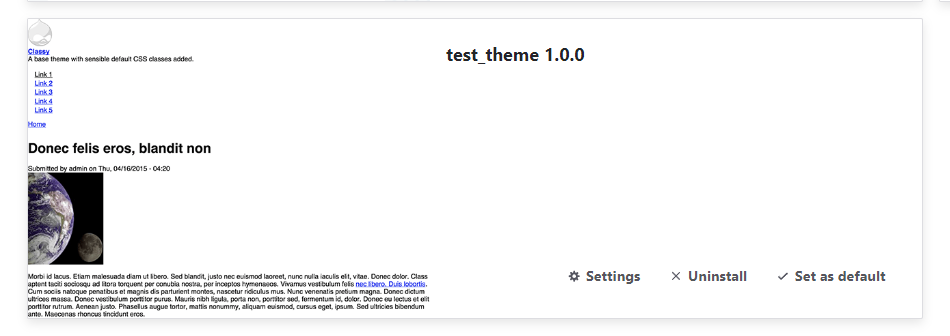
Click Set as default to apply the theme.
Clear cache and check the top page of the site. Here’s a screenshot below.
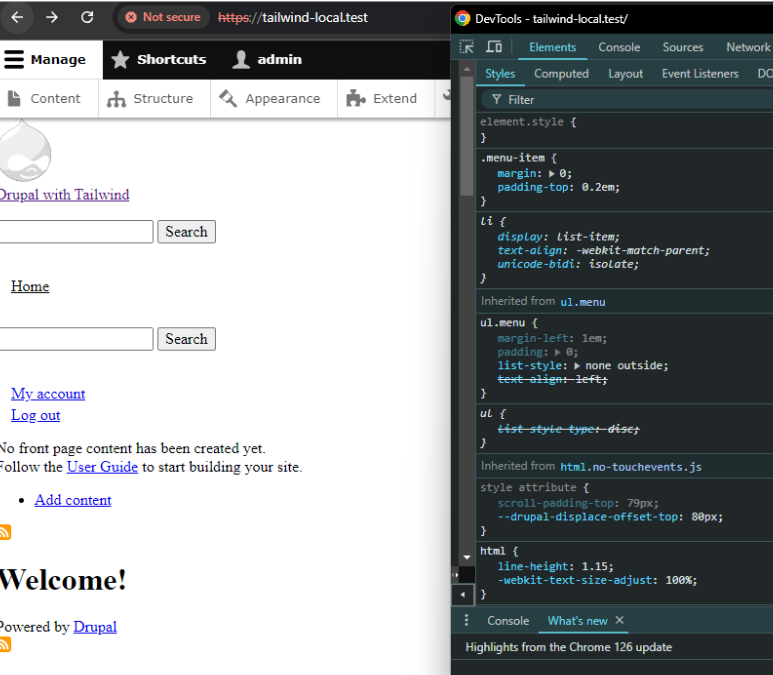
As you can see, the new theme is now applied as evident on Top Page. The inspection of elements shows the default theme’s CSS classes and properties. We can confirm here that Tailwind CSS is not yet implemented.
STEP 3. Import tailwind and its dependencies
In the terminal, set the directory to the new theme’s folder. Run the following command using npm to install “Tailwind CSS” and its dependencies. After this, run the init command to generate tailwind and PostCSS config.js files.
npm install -D tailwindcss postcss postcss-loader autoprefixer
npx tailwindcss init -p
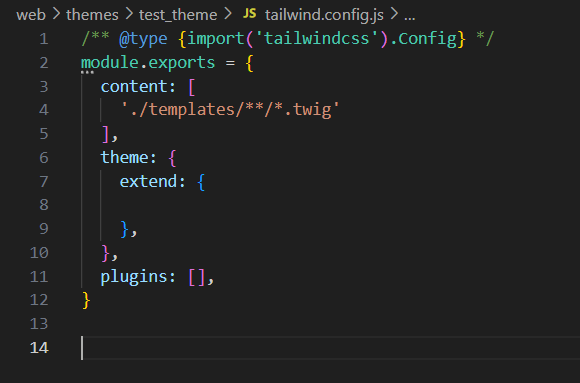
STEP 4. Configure your templates path
To do this, open tailwind.config.js. Set inside the content array the path to your templates. You may write the following line to include all twig templates under the /templates folder inside your custom theme. This tells the configuration to include all twig templates inside the templates directory.
STEP 5. Add your base CSS file.
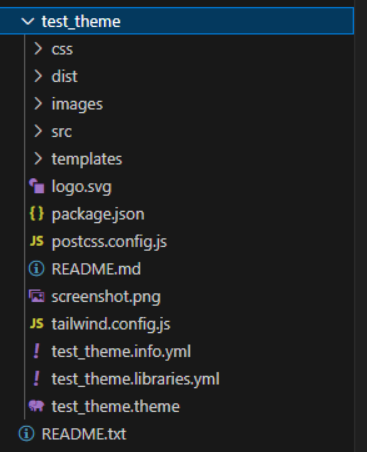
Inside /themes/test_theme/src folder, create a new file (index.css) to serve as the theme’s base css. Add inside the @tailwind directive. This will pull in the tailwind classes from the node_modules directory.
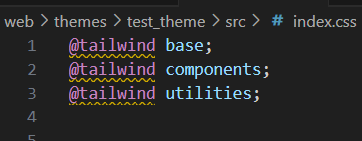
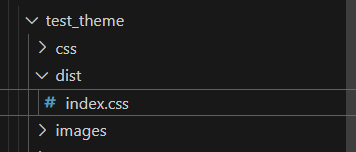
Add another folder under test_theme directory, /dist. This will contain the generated CSS file when the DEV environment is run.
STEP 6.
Add a script for the build process. Inside the package.json file, include the following line:
npx tailwindcss --input ./src/index.css --output dist/index.css
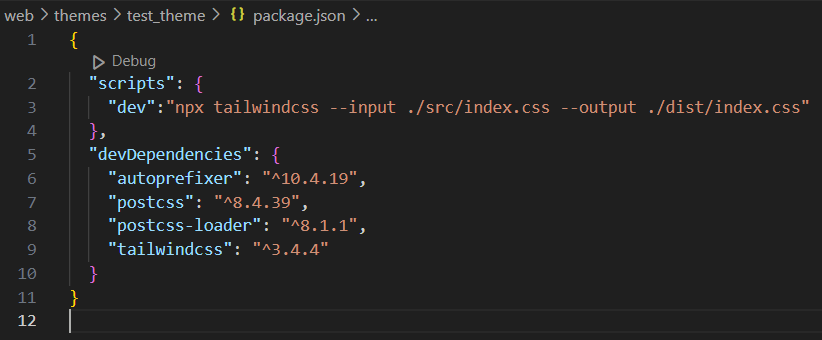
Test the script by running, npm run dev. It should build the index.css file inside the /dist folder.
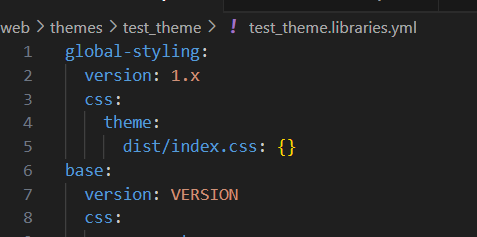
STEP 7. Add the tailwind-ready css file into Drupal.
Define all of your asset libraries in a .libraries.yml file in your theme folder. To do this, add a new stylesheet inside the libraries.yml:
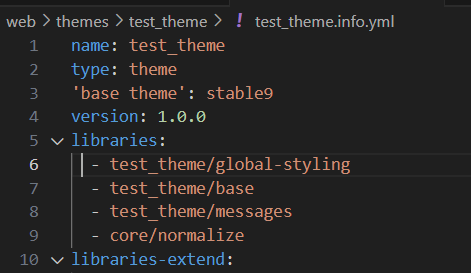
STEP 8. Import library into theme’s info.yml
Clear cache and there you have it! Viola! Tailwind CSS is now successfully implemented in your Drupal site.
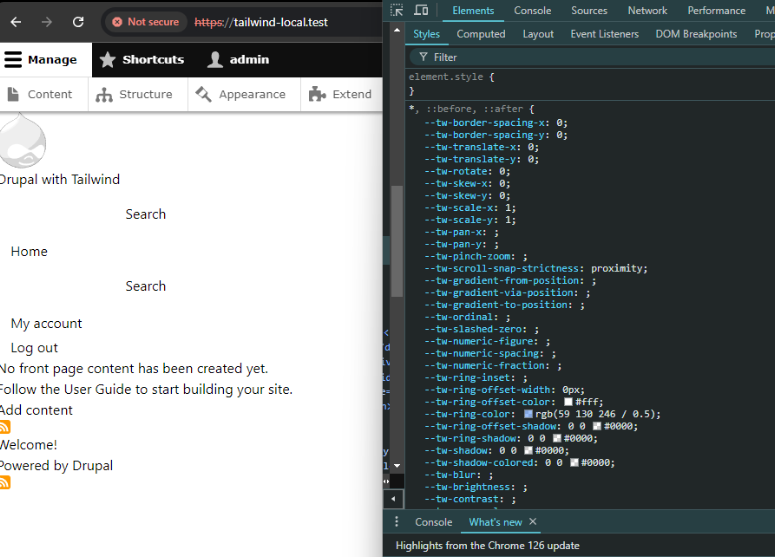
To verify this, you may inspect the site to see on the elements if tailwind properties are visible. You may expect such inspection results below.
To further test, let’s try to modify the top view using Tailwind CSS properties.
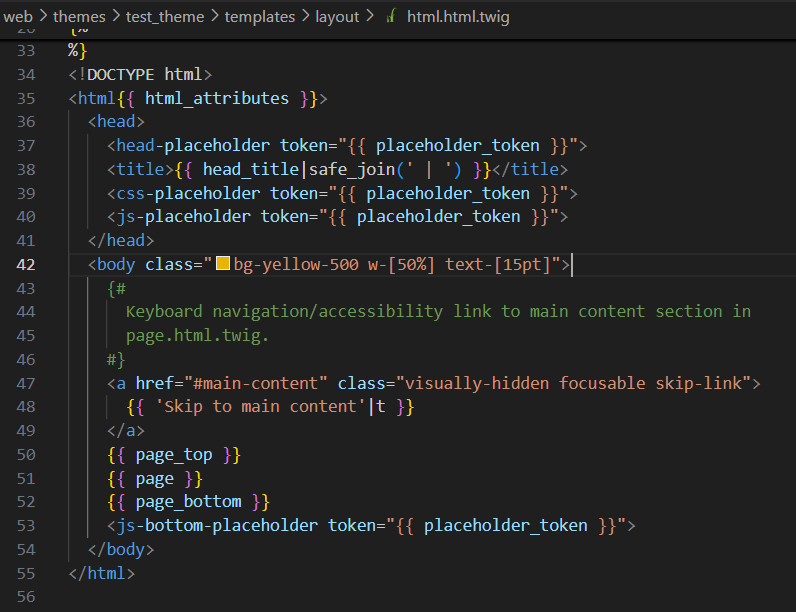
Create a test Article content. Navigate to the html.html.twig file in your code, and set class to the body tag as follows:
It is important to run the tailwind script (npm run dev) again in the theme’s directory to generate the base CSS from these tailwind properties. This will update the existing base CSS in the /dist folder which is then used as out custom stylesheet. After rebuilding is done, clear Drupal cache.
Check the top page and you may now see that the classes are implemented as designed.

Before we end, here’s a tip: for Visual Code users, install Tailwind CSS IntelliSense for easier templating.
Happy designing!